If air assist is not working on your Sculpfun S30 during a cut, separate four things: the layer requesting air, the selected device's command configuration, the pump's response, and airflow reaching the nozzle. An enabled switch in LightBurn does not confirm all four.
If air assist is not working on your Sculpfun S30 during a cut, separate four things: the layer requesting air, the selected device’s command configuration, the pump’s response, and airflow reaching the nozzle. An enabled switch in LightBurn does not confirm all four.
The first useful checks are visible in the software and on the outside of the machine. Complete those before considering a replacement pump. This guide explains the controls and expected observations using primary documentation; it is not a diagnosis of your individual controller or installation.
Safe checks in the order that saves time
- Stop the affected job. Use the machine’s normal stopping procedure. Investigate settings without starting a material cut.
- Select the correct device. In LightBurn’s Laser window, confirm the profile for the connected S30 configuration. Open Edit → Device Settings for that selected device.
- Inspect the Air Assist command. In the device’s basic settings, locate Air Assist and compare the M7 / M8 choice with the Sculpfun configuration. Sculpfun documents M8 for its automatic S30 arrangement.
- Inspect the affected layer. Open Window → Cuts / Layers, select the layer, and find Air. Double-click the layer to open Cut Settings Editor when the compact controls do not show the required option.
- Compare another saved project. A different Air state on one layer can explain why one project requests the pump and another does not. This comparison does not require firing the laser.
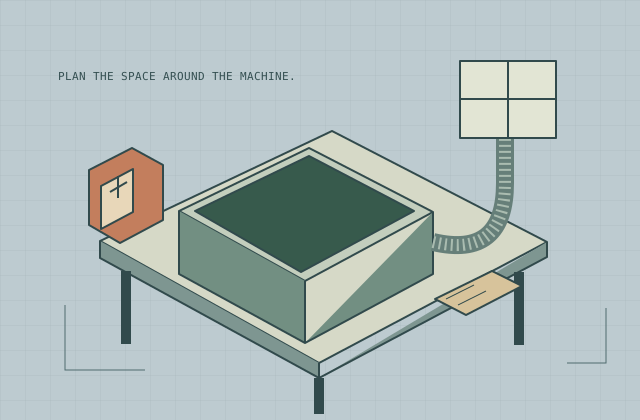
- Inspect the accessible external tube path in the manual’s shutdown state. Look for a disconnected tube, a visible kink, damage, or a tube trapped after moving the machine.
- Escalate unexplained hardware behavior. Resets, electrical smells, damaged wiring, or a supported configuration that still fails are reasons to stop and use the manufacturer’s service route.
The expected software correction is a matching selected device, the documented command, and the intended Air state on each output layer. Those settings request air; physical response still needs the exact manufacturer’s permitted observation or diagnostic procedure.
Check the selected device and affected layer
Then compare M8 configuration and the external tube path. Stop on resets or damaged wiring.
Record which failure you actually have
“Air assist does not work” can describe several different symptoms. Write down the one you observed before changing settings.
| Symptom | Software category to inspect | Hardware/external category | Next useful action |
|---|---|---|---|
| No response in one project | Air off on the relevant layer | Not established from this symptom | Compare layer settings with a known working saved project |
| No response in every project | Wrong selected device or command | Unsupported connection, pump or control fault | Verify profile and M8; then follow the model-specific service route |
| Pump appears active, nozzle air is weak | A command is not an airflow measurement | Tube routing, connection or pump output | Inspect accessible routing after the prescribed shutdown |
| Air always runs | Automatic versus manual arrangement; expected controller state | Installed kit or connection differs | Identify the exact installed hardware before changing parts |
| Reset/disconnection when air is requested | Preserve the exact error and selected profile | Electrical or component issue remains possible | Stop repeated testing and report the complete symptom |
| Failure follows an update | Different device profile or layer state | Timing alone does not isolate a component | Compare the saved settings before reinstalling or resetting |
These observations are not component diagnoses. A reset does not prove a defective pump, and silence does not prove that the software failed to send a command.
If there is unusual heat, a damaged cable, an electrical smell, or another condition addressed by the manufacturer’s shutdown instructions, stop and follow those instructions. Do not continue the diagnostic sequence as if it were only a menu-setting issue.
Identify S30, S30 Pro and S30 Pro Max before choosing a part
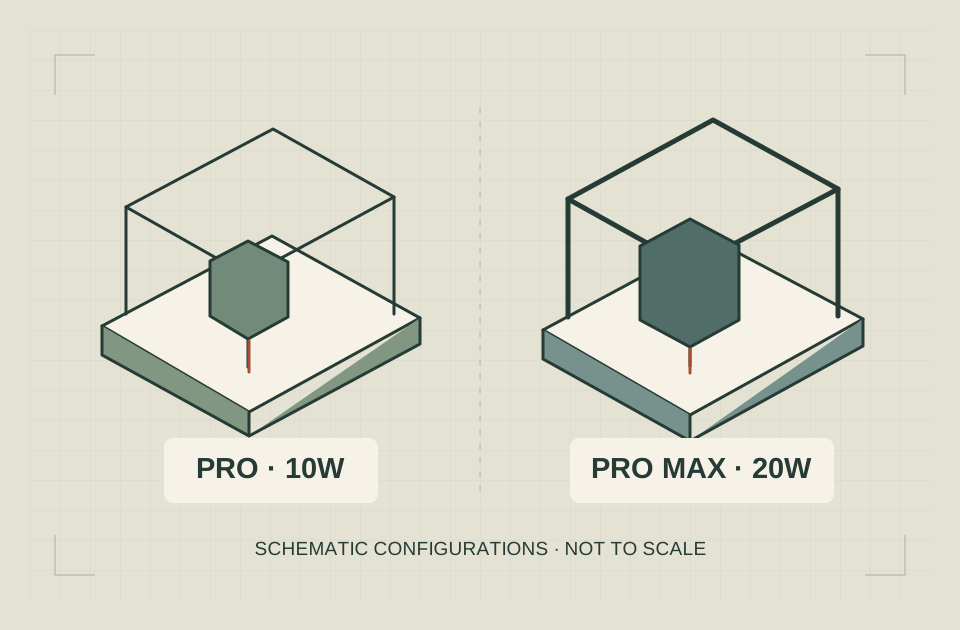
The original S30 series contains three different source configurations. Their shared automatic-air concept does not make the installed electrical components interchangeable.
| Model identity | Documented optical output | What this changes in troubleshooting |
|---|---|---|
| S30 | 5W | Use the manual and labels for the original 5W setup |
| S30 Pro | 10W | Match the 10W machine and its installed pump/control components |
| S30 Pro Max | 20W | Treat the Pro Max’s associated hardware as its own configuration; obtain a matching replacement specification |
The Sculpfun series explanation distinguishes the 20W system from the smaller modules. Product listings also contain conflicting ancillary electrical information, so no substitute voltage or adapter is recommended here. The label on your unit and the manufacturer’s identified replacement part are the useful next evidence.
The S30, S30 Pro, S30 Pro Max, and S30 Ultra are different configurations. An older S9 or S10 fitted with an automatic-air kit is another case.
Sculpfun’s S30 product description describes an automatic air-assist arrangement controlled through LightBurn’s M8 setting. Its S9/S10 automatic-air upgrade kit includes associated hardware rather than just a generic pump.
Record the machine’s full model name, controller identification if available without disassembly, installed pump identification, and whether the configuration is original or upgraded.
Match a replacement by its supported part identification and electrical specification. Similar-looking connectors alone are not a compatibility match.
Get the relevant manual through Sculpfun’s Download Center. Match it to your actual model rather than a search result containing only the word S30.
If you are unsure which board or kit is installed, ask the seller or Sculpfun to identify it from external labels and purchase records. Guessing the model undermines every later settings comparison.
Save the current state before troubleshooting
Preserve the project under a new filename and capture the relevant settings before changing them. You need a reliable record of what the machine was using when the symptom appeared.
Include the installed LightBurn version, selected device name, connection method, and the affected layer. If the problem started after a change, record the last known working arrangement separately.
Do not begin with a factory reset, firmware flash, or deletion of every device profile. Those changes can erase useful evidence and introduce unrelated motion or communication problems.
A simple diagnostic worksheet can keep the work focused:
| Check | Record |
|---|---|
| Machine identity | Exact model and whether it is upgraded |
| Software | Installed release, not just “latest” |
| Selected device | The actual profile name |
| Affected project | Filename and revision |
| Layer requesting air | Color/name and output state |
| Air-assist command setting | The observed option |
| Last known working state | Date, version, project, and configuration if known |
| Observable response | No response, running pump, airflow difference, reset, or error |
Use literal observations. “Pump ran but no clear airflow was observed” is more useful than “the motherboard is dead” when no qualified diagnosis has established that conclusion.
Cuts / Layers → affected output layer → Air state.
Selected device → Device Settings → documented M8 configuration.
Observe only through the exact permitted diagnostic procedure.
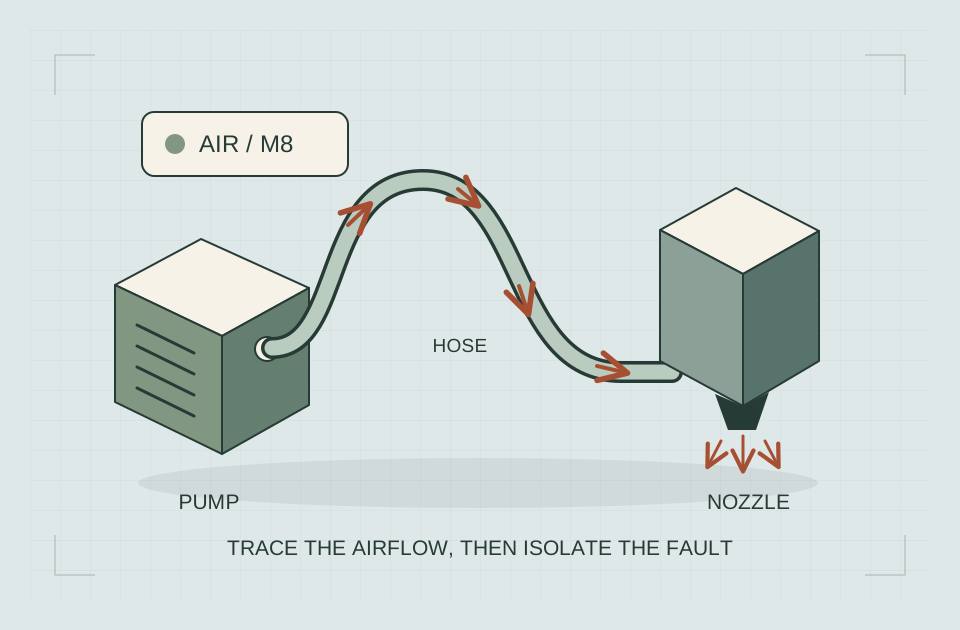
Accessible tube routing and nozzle path inspected in the manual's prescribed state.
Where Device Settings and the Air toggle differ
Use the selected-device control in the Laser window to choose the profile for the connected machine. A saved profile named “S30 Pro Max” is only a useful label if it contains the intended controller configuration. Compare its device type with the supported Sculpfun setup.
Open Edit → Device Settings after selecting that profile. In Basic Settings, find Air Assist and the command choice for a GCode device. The LightBurn 2.1 Basic Settings reference describes the M7/M8 selection. Images for a DSP device show different controls, so use the GCode section relevant to the documented S30 arrangement.
The setting answers which command represents an air request. It does not answer whether this particular layer requests air. That second decision is made in the layer controls. A correct M8 choice combined with Air off on the relevant output layer can therefore look like a pump that “works in the console but not in my project.”
If you maintain several machine profiles, rename them with the complete model and kit identity. Capture the chosen device name with the settings screenshot so support can see which configuration was inspected. Keep unrelated motion settings unchanged during this software comparison.
For a communication error, establish the actual USB/controller connection before investigating airflow. Our laptop and LightBurn connection guide covers that computer-side path.
Inspect the layer that actually runs
Air can be requested at the layer level. Check the relevant layer rather than assuming that one enabled toggle applies to every operation in the project.
LightBurn’s Main / Shared Settings reference explains the Air control and the distinction between automatic and manually controlled systems.
Select the operation associated with the observed symptom. Confirm its output state and Air setting. If a design contains an engraving layer followed by a cutting layer, inspect both; their intended supported settings may differ.
This is a software inspection, not an instruction to disable required air during a cutting process. Follow the machine and material workflow when deciding which layers require it.
If one project works and another does not, compare the layer settings in saved copies. Keep the machine and selected device constant while making that comparison.
An Air toggle cannot add automatic control to hardware that does not support it. If your pump is independently powered and manually switched, establish its documented operating method instead of trying to solve the difference through a software checkbox.
Affiliate link · We may earn a commission on eligible purchases. How funding is disclosed.
S30, Pro and Pro Max need the right manual
Use the official manual for diagnosis. The accessory collection is a place to research available equipment, not a confirmed replacement pump or controller. Match compatibility before ordering.
- S30: 5W configuration
- S30 Pro: 10W configuration
- S30 Pro Max: 20W configuration
Understand M8 without treating it as a universal repair
For GCode-based devices, LightBurn documents a choice between M7 and M8 for enabling air assist. Sculpfun’s automatic-air descriptions identify M8 for the relevant arrangement.
The controller command and physical hardware must agree. Choosing M8 in the software does not turn an unsupported output into a compatible pump connection.
The GRBL command documentation groups M7, M8, and M9 within coolant control. Laser software can use the supported output for air assist, but that terminology does not establish identical wiring on every controller.
You may encounter forum instructions to send M8 or M9 directly in the console. Treat those as descriptions of a particular diagnostic context, not a complete operating procedure.
Before any manual command test, obtain the exact machine’s supported method, preparation, expected response, and stopping procedure. A command by itself does not define a safe test. Do not add laser-firing commands or bypass a protective condition to make an airflow check “more realistic.”
If the software is configured as the manufacturer’s instructions require and the system still does not respond, record that result for support rather than cycling through unrelated commands.
Distinguish an air request from actual airflow
A successful software interaction does not verify the physical outcome. The controller may accept a request while a downstream component or air path still fails to deliver the intended flow.
Likewise, a sound is not a calibrated airflow measurement. An observation that the pump seems active should be recorded separately from whether air reaches the nozzle through the supported path.
Do not put a hand or object into an operating laser workspace to feel for air during a job. Use only the observation method and machine state allowed by the manufacturer’s instructions.
Avoid diagnosing the component from one observation. “No airflow at the nozzle” could require a different investigation from “the controller disconnects when air is requested,” even if both were first described as an air-assist failure.
The practical aim is to narrow the problem enough for the next justified step. You do not need to identify a failed electronic part in order to prepare a useful support request.
Check the external tube path using the manual
The manufacturer’s S30 series manual includes an air-tube and cable installation step and diagrams of the pump connection. Use the edition and configuration that match your machine.
After following its shutdown and preparation instructions, compare the accessible external routing with the documented arrangement. Look for an obvious disconnected tube, a visible kink, damage, or routing that has become trapped.
Do not copy a hose diameter from a different model listing and assume it is the right replacement. Record the original component and obtain the supported specification.
The manual also addresses keeping the air tube and cables appropriately routed. If the symptom followed moving the machine or changing an accessory, include that event in the record.
Do not disassemble a nozzle, open a pump, or disconnect electrical components unless the exact manufacturer procedure authorizes that task and you can perform it competently. A general troubleshooting article cannot establish those conditions remotely.
If the external path appears to match the manual, that does not prove its internal condition or the pump’s output. Record the observation without escalating it into a diagnosis.
When air assist stays on instead of staying off
An always-on symptom is different from no response, and the same checklist should not force both into one conclusion.
First establish whether your arrangement is designed for automatic control. A separately switched pump may correctly continue running regardless of a layer setting. An upgraded machine may have a different installed arrangement from an original S30.
Next, capture what “off” means in your report. Is the Air toggle off in one layer, has the job ended, or has an approved manual control been used? Those are different observations.
Do not repeatedly reconnect the pump or move it to another power source as an experiment. Ask support to confirm the supported connection and expected behavior for the installed parts.
If you are comparing with a forum post, match the machine, controller, pump, firmware context, and software version. A useful discussion can still describe hardware that differs from yours.
If the fault started after a LightBurn update
A change in timing is useful evidence, but it does not prove that the new release damaged hardware or introduced the underlying fault.
Compare the recorded device selection and layer settings first. Capture any exact error message. If you dismissed a connection prompt, describe what you remember without inventing the wording.
The developer’s S30 setup video covers the machine and air-assist setup, but it was published in 2022. Use it as model-specific background, then match the controls to your installed release and current documentation.
Avoid reinstalling multiple versions before saving the current project and settings. If support recommends a version comparison, ask what should remain constant and what result would be meaningful.
A new version, a different device profile, a changed cable, and an altered project tested together cannot reveal which difference mattered. Keep a dated record of one change at a time.
Do not flash firmware merely because an update and a failure occurred near each other. Firmware work needs an exact model-specific reason and procedure.
Know where noninvasive troubleshooting ends
Stop at the boundary of documented user checks. Opening the controller box, probing a powered board, bridging a connection, or trying an alternate supply is not a justified next step merely because someone reported success online.
The manufacturer’s service instructions and your competence determine what is appropriate. If a procedure is unclear, obtain written clarification before acting.
Report a machine reset, unexplained electrical behavior, or visible damage directly. Do not continue running jobs to collect more examples of the same potentially significant fault.
A replacement purchase should follow an identified compatibility requirement and a support conclusion, not a guess based on the shape of a plug. Automatic-air kits can contain multiple associated components.
Our small-workshop laser setup guide keeps the wider equipment and maintenance record organized. It does not convert an unresolved hardware condition into an approved operating setup.
Prepare a support request that can move forward
A concise, complete report saves repeated questions. Use the manufacturer’s support route listed in its current documentation, and keep purchase details private when posting publicly.
Include:
- Exact machine, controller, pump, and upgrade-kit identification.
- LightBurn version and selected device profile.
- Affected project and layer settings.
- The symptom and when it first appeared.
- The last known working configuration.
- Any visible external routing issue or exact software error.
- The documented checks already completed and their observations.
Attach relevant screenshots and external-label photographs when they can be obtained in the permitted machine state. A short video may help if support requests one and specifies a safe demonstration.
Ask a focused question: “Does this identified configuration support the selected M8 setting, and what is the approved next diagnostic step?” That is easier to act on than “Which pump should I buy?”
If the machine is under warranty, establish the approved service path before disassembly or substitution. Do not infer the warranty outcome from another user’s experience.
Return to the documented production configuration
Once the cause has been addressed through a supported procedure, restore the reviewed project and device configuration. Verify that diagnostic copies or temporary changes will not become the next production file by accident.
Use the manufacturer’s acceptance check before resuming material processing. Confirm the behavior that originally failed, not merely that one interface toggle looks correct.
Keep the resolution with the original symptom record. Note which setting or component changed, who supplied the procedure, and which machine configuration it covered. That record is more useful for a later recurrence than an unlabelled screenshot.
The fastest useful route is to separate the software request, controller configuration, pump response, and external air path. Resolve what you can document, then escalate the remaining uncertainty. Replacing parts or continuing to cut without understanding the missing air does not shorten that route.
Take a complete symptom record to support
Bring the exact model, LightBurn version, layer settings and observed response. The official support page is the next step for unexplained hardware behavior.
Sources & specifications
Reviewed 2026-10-17. Compatibility tables apply to the manufacturer's equipment; confirm your exact machine, stock and accessories before use.
www.sculpfun.com sculpfun s30 series ↗
Checked · Technical reference checked during the October 17 article revision; no personal equipment testing claimed.www.sculpfun.com sculpfun s30 laser engraver machine 5w ↗
Checked · Technical reference checked during the October 17 article revision; no personal equipment testing claimed.www.sculpfun.com sculpfun automatic air assist system kit ↗
Checked · Technical reference checked during the October 17 article revision; no personal equipment testing claimed.Sculpfun Sculpfun® iCube Series — Official user guide / specifications ↗
Checked · Official iCube guides and parameters; C1 and G9 manuals are also listed here. Model-specific figures cross-checked against manufacturer specifications. Product claims are not our test results or safety clearances.docs.lightburnsoftware.com BasicSettings ↗
Checked · Technical reference checked during the October 17 article revision; no personal equipment testing claimed.docs.lightburnsoftware.com SharedSettings ↗
Checked · Technical reference checked during the October 17 article revision; no personal equipment testing claimed.github.com commands.md ↗
Checked · Technical reference checked during the October 17 article revision; no personal equipment testing claimed.cdn.shopify.com SCULPFUN_S30_Series_User_Manual_2.pdf ↗
Checked · Technical reference checked during the October 17 article revision; no personal equipment testing claimed.www.youtube.com watch ↗
Checked · Technical reference checked during the October 17 article revision; no personal equipment testing claimed.Independent research. This article contains an affiliate recommendation; we may earn a commission on eligible purchases. How funding is disclosed.