A suitable bench is only the beginning. Resolve the machine's enclosure, exhaust, access control and operating requirements before the first job, and leave unknown requirements as open blockers.
The machine footprint is the smallest useful version of a workshop plan. A working installation also includes the path of the fumes, the person supervising, the object being loaded and the access needed to maintain the equipment.
Use this guide to organize questions and record decisions. It is not an operating manual, a certification of safety or an exhaust-engineering design. Requirements depend on the exact machine and operating configuration. Resolve uncertain requirements with the manufacturer and qualified local specialists before operating.
Choose a location you can actually manage
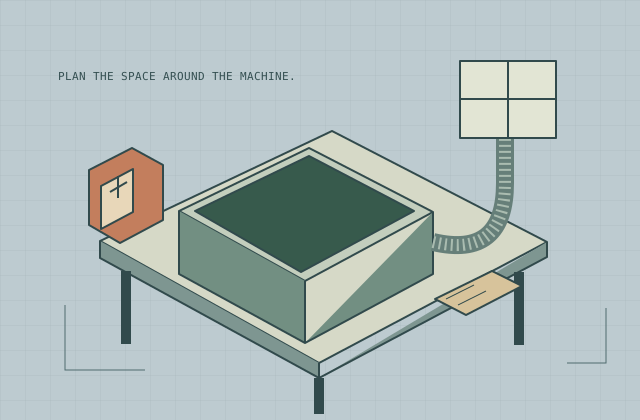
Draw the room and mark the bench, doors, power access and proposed exhaust route. Include the largest workpiece, lid movement and the places where you will stand to load and supervise. Keep the power disconnect accessible as the manual requires.
Add other uses of the room to the drawing. Can a child, visitor or pet enter while the machine operates? Does the exhaust discharge toward a neighbor’s window or a path? Can stock be stored without obstructing access? The best-looking spare corner may be the wrong installation once these questions are included.
Do not borrow clearance or electrical requirements from a different model. For scale only, xTool lists its S1 without riser at 765 × 561 × 183 mm. Those are equipment dimensions, not approved installation clearances. S1 User Guide.
Record the room conditions, support surface, circuit and clearances specified in your own manual. If they cannot be met, keep the location unresolved rather than adjusting protective equipment to make the machine fit.
Resolve enclosure and eye protection together
Read the label and manual for the full configuration, including any pass-through arrangement or accessory. The FDA distinguishes laser hazard classes and describes Class IV hazards as including direct or reflected exposure and possible fire risk. Invisible laser light can still be hazardous. FDA laser safety overview.
An enclosure should be the one specified or approved for the machine and process. A generic tinted box is not evidence of protection. If the manual requires protective eyewear, obtain the wavelength coverage and optical-density requirements for that exact configuration from the manufacturer or qualified laser-safety professional. Do not choose glasses by color, and do not treat them as permission to remove other controls.
Glowforge’s Performance-series instructions warn against damaged or modified housings and defeating interlocks. That is a model-specific instruction, and a sound reason to investigate protective controls before purchase. Performance-series safety.
Write down access restrictions and how everyone using the workspace will learn them. Do not bypass protective mechanisms for convenience.

Plan laser engraver ventilation and the entire exhaust route
Treat ventilation as part of the installation, not an accessory to add if the smell becomes unpleasant. Record the manufacturer’s approved arrangement, including connections, routing, equipment and maintenance. Do not invent a universal fan rating or assume an open window is a complete control system.
Glowforge’s Performance-series manual requires outdoor exhaust or its specified filter, directs users to consider local air-quality rules and neighbors, and tells users to stop if smoke escapes or irritation persists. These are that manufacturer’s requirements; another model needs its own documented design. Exhaust requirements.
For your installation, settle these questions:
- Where will the exhaust go, and who else can be exposed there?
- Does the complete routing match the manual, including connection and clearance requirements?
- If filtration is permitted, which exact unit and consumables are approved, and what is the replacement procedure?
- What signs of failure does the manual identify, and how will you stop operation if they occur?
Do not use a filter as justification to process material the manufacturer does not permit. Keep filter replacements and duct inspections in the maintenance plan. If the route is unclear, have it reviewed before use.
Identify materials before they reach the bench
Create a stock record with supplier, exact product, composition, coatings and evidence of compatibility. Keep the documentation with the stock. “Looks like acrylic” and “someone online cut this” are not reliable material identities.
Glowforge advises checking the manufacturer, safety data sheet and/or an expert for custom materials. It flags unidentified plastics and coatings as sources of uncertainty. Custom Materials FAQ.
Exclude PVC/vinyl and unidentified plastics from your proposed workflow; xTool’s current M2 material guide says PVC-containing stock must never be lasered. Never use a trial burn to identify an unknown plastic. xTool M2 material restrictions.
For wood, ask about adhesives and finishes. For coated metal, identify the coating as well as the alloy. For decorative blanks, check backing, glue and masking. A confirmed material name does not automatically clear every treatment applied to it.
Label uncertain stock “not cleared for laser processing” and keep it out of the job queue until the uncertainty is resolved.
Make supervision and fire planning practical
Reserve time to stay at the machine rather than treating a job as background work. Glowforge’s instructions require remaining within sight during operation and removing accumulated debris; they also restrict nearby flammable storage. Fire precautions.
Follow your machine’s emergency and shutdown procedure. Identify the disconnect and exit, and have suitable fire-response arrangements selected with the manufacturer’s guidance and appropriate local advice. A fire-detection accessory does not replace supervision. Do not rely on a remote camera as the only observer.
Create a short pre-job habit: clear the operating area, check the stock record, confirm required controls and verify that you can supervise the whole job. If you have to leave, use the documented stop procedure instead of leaving the machine operating.
Check accessories and maintenance access
A rotary is not merely a cylinder holder. Confirm the supported model, usable object dimensions, positioning method and any required riser or enclosure changes. Check handles, taper and fixtures separately. Do not remove a cover or interlock to gain clearance.
Make a maintenance list from the manual: the parts users may clean, permitted cleaning products, inspection intervals and components reserved for authorized service. Do not improvise optical cleaning or electrical repairs from a generic tutorial.
Leave bench space for unloaded parts to cool and for normal handling. Store compatible stock so you can retrieve it without crossing the operating area. These are workflow planning suggestions; the exact operating precautions still come from the machine documentation.
Fill in the true setup cost
Use this printable worksheet with actual supplier quotes. There are deliberately no preset prices or totals. Mark “included” only after checking the package contents, and “not required” only when your verified setup does not need the item.
| Item | Exact requirement / model | Your quote | Ongoing cost / notes |
|---|---|---|---|
| Machine and delivery | __________________ | ______ | Tax, support, warranty |
| Approved enclosure | __________________ | ______ | Included? configuration? |
| Exhaust or approved filtration | __________________ | ______ | Filters / maintenance |
| Required protective equipment | __________________ | ______ | Exact manual requirements |
| Fixtures / supported rotary | __________________ | ______ | Clearance and mounting |
| Compatible starting stock | __________________ | ______ | Supplier documentation |
| Software / computer | __________________ | ______ | Required version / license |
| Installation / specialist review | __________________ | ______ | Unresolved requirements |
| Total initial setup | __________________ | ______ | Separate recurring costs |
Keep unresolved requirements visible alongside the cost. A cheaper quote does not resolve a missing exhaust route or unsupported material process.
Prepare the first job without guessing settings
Once material compatibility and installation requirements are resolved, use the manual’s setup sequence to check the document units, intended dimensions, placement and supported focus procedure. If the manufacturer calls for a calibration or sample job, follow its documented instructions with approved stock. Keep a record of the exact stock and settings; a successful result on one blank is not clearance for a different formulation or coating.
Keep the workspace plan and job notes together. Record who will supervise, where unloaded parts go and which documented checks must be repeated after moving the equipment. This is a planning record, not a substitute for the machine’s operating procedure.
Your before-first-job checklist
Print this list and use your manual to complete it. A checked box documents your review; it does not certify the installation.
- Exact model, source and operating configuration recorded.
- Current manufacturer manual read, including safety and emergency procedures.
- Location, power, support surface and access requirements resolved.
- Required enclosure, interlocks and protective equipment identified and present.
- Exhaust or permitted filtration arrangement verified; discharge implications reviewed.
- Material identity, coatings and process compatibility documented.
- Fixtures and accessories confirmed for this configuration.
- Supervision time reserved; access restrictions explained to other occupants.
- Shutdown, emergency response and maintenance arrangements understood.
- Every unanswered safety question resolved before operation.
Still selecting a machine? Use the material-first buying guide and the format comparison to narrow the equipment before committing to an installation.
Home workshop setup questions
Can I install a laser engraver in an apartment?
Possibly, but floor space alone does not answer the question. Resolve the manufacturer’s requirements, discharge location, other occupants and any building or lease restrictions before committing. If you cannot establish an approved exhaust or filtration arrangement and controlled access, leave the installation unresolved rather than treating a balcony door as a solution.
What changes when setting up a laser engraver in a garage?
Include the garage’s other uses in the installation plan: vehicle movement, stored fuel or solvents, access by other occupants and the proposed exhaust discharge. Follow the exact manual for room conditions, power and clearances. Glowforge’s Performance-series instructions prohibit storing flammable vapors such as gasoline in the same room; check your own machine’s requirements rather than assuming a garage is automatically suitable. The ventilation section above explains why an open door does not establish an approved exhaust arrangement.
Which app and material settings should I use?
Start with the software and workflow supported for your exact model, operating system and controller. Confirm the connection method, file dimensions and units, focus procedure and material identity before entering settings. Record the documented configuration with the job. A general settings guide cannot supply a universal power/speed recipe; follow manufacturer guidance rather than borrowing numbers from another source or machine.
Does an enclosed laser engraver still need exhaust?
Check the manual: optical containment and fume control address different problems. For example, Glowforge’s Performance-series instructions require outdoor exhaust or its specified filter. This model-specific rule is not a universal specification for other machines. Glowforge smoke and fume safety.
Does a safety data sheet make a plastic safe to laser?
No. Use the SDS to investigate composition and hazards, alongside explicit machine and material-supplier guidance. Glowforge cautions that lookalike materials and coatings can behave differently under processing. Missing information is a reason to stop, not to identify stock with a trial burn. Glowforge material-identification guidance.
Return to the laser engraving guides hub when you need to revisit material selection or machine format before finalizing the space.
Sources & specifications
Reviewed 2026-10-13. Compatibility tables apply to the manufacturer's equipment; confirm your exact machine, stock and accessories before use.
Glowforge Safety — Glowforge Performance Series ↗
Checked · Performance-series supervision, enclosure, exhaust, materials and fire precautions. Model-specific.Glowforge Custom Materials FAQ ↗
Checked · Material identity, supplier confirmation, SDS; anodized aluminum marking and slate cautions.xTool xTool S1 User Guide ↗
Checked · 40 W configuration only: dimensions, working area, mass, connections. Guide includes US specifications.Independent research. No affiliate links are active. How funding will be disclosed.